Showing posts with label Poppystamps. Show all posts

Thursday, May 27, 2021

A new thing

 Wow - it's been a long time since I've updated this blog.  I went off social media at the beginning of the year and am now easing back with instagram.  I also think there are some changes with blogger coming up soon so I don't even know if you'll be receiving emails when I do post.  So if you're on instagram, I hope you pop on over and follow me there at @yourstrulybydiana

The other reason I have not been posting as much is because I picked up another hobby - crocheting and I've become a total yarn addict.  Will I use much of what I make? I actually don't know but I do love making pretty things.  It's also gardening season so there's that also!  

But I did pop into my craft room to make a special card for our BSF teaching leader for her retirement as she starts something new.  I created the verse digitally and then added all my favorite dies to it - the butterflies just went perfectly with the new theme.  Poppystamps and Memory Box always were my favorite butterfly die designers and I never tire of using them.


Challenges I am playing in:
WordArtWednesday

Bonus: Some of the crochet projects I made: Shawls and mini backpacks


Wednesday, December 18, 2019

Tea-rific Birthday

Just a quick pop in (because it's crazy busy this month as I'm sure it is for you) to share a card I made for a birthday that had a tea party theme. I masked and sponged the Poppystamps Teacup stack die and added a handwritten tag to the Sweet 'n Sassy Stamps birthday die.

Have a great week - only one more left until Christmas!


Challenges I am playing in:


Thursday, March 8, 2018

Find yourself a cup

Today I pulled out a couple of oldies but goodies... 

Ever since I saw this Find yourself a cup stamp, I knew exactly what I wanted to do with it.  But then I got side tracked and never got to ink it up.  But today I sat down with purposeful intention and made this card that is perfect for old friends who might just happen to enjoy tea.


I used Distress Oxides to make a gradient of soft colors with which to die cut my teacup stack (by Poppystamps).  After carefully stamping my sentiment on the top right corner of my 4 1/8" x 5 3/8" white layer, I masked and sponged a line to make it look like my stack of cups were on a table.  I also added a bit of steam from the flourish die from the Calligraphic Elements 3 die set.


The best news about this oldie but goodie is that it is now a mounted stamp!  Yay!


Now I'm thinking this might be a cute little sign on a tiny easel next to some pretty tea cups.  Hmm...


Find Yourself a Cup - Mounted

Calligraphic Elements 3 - Metal Cutting Dies

Challenges I am playing in:

Thursday, March 9, 2017

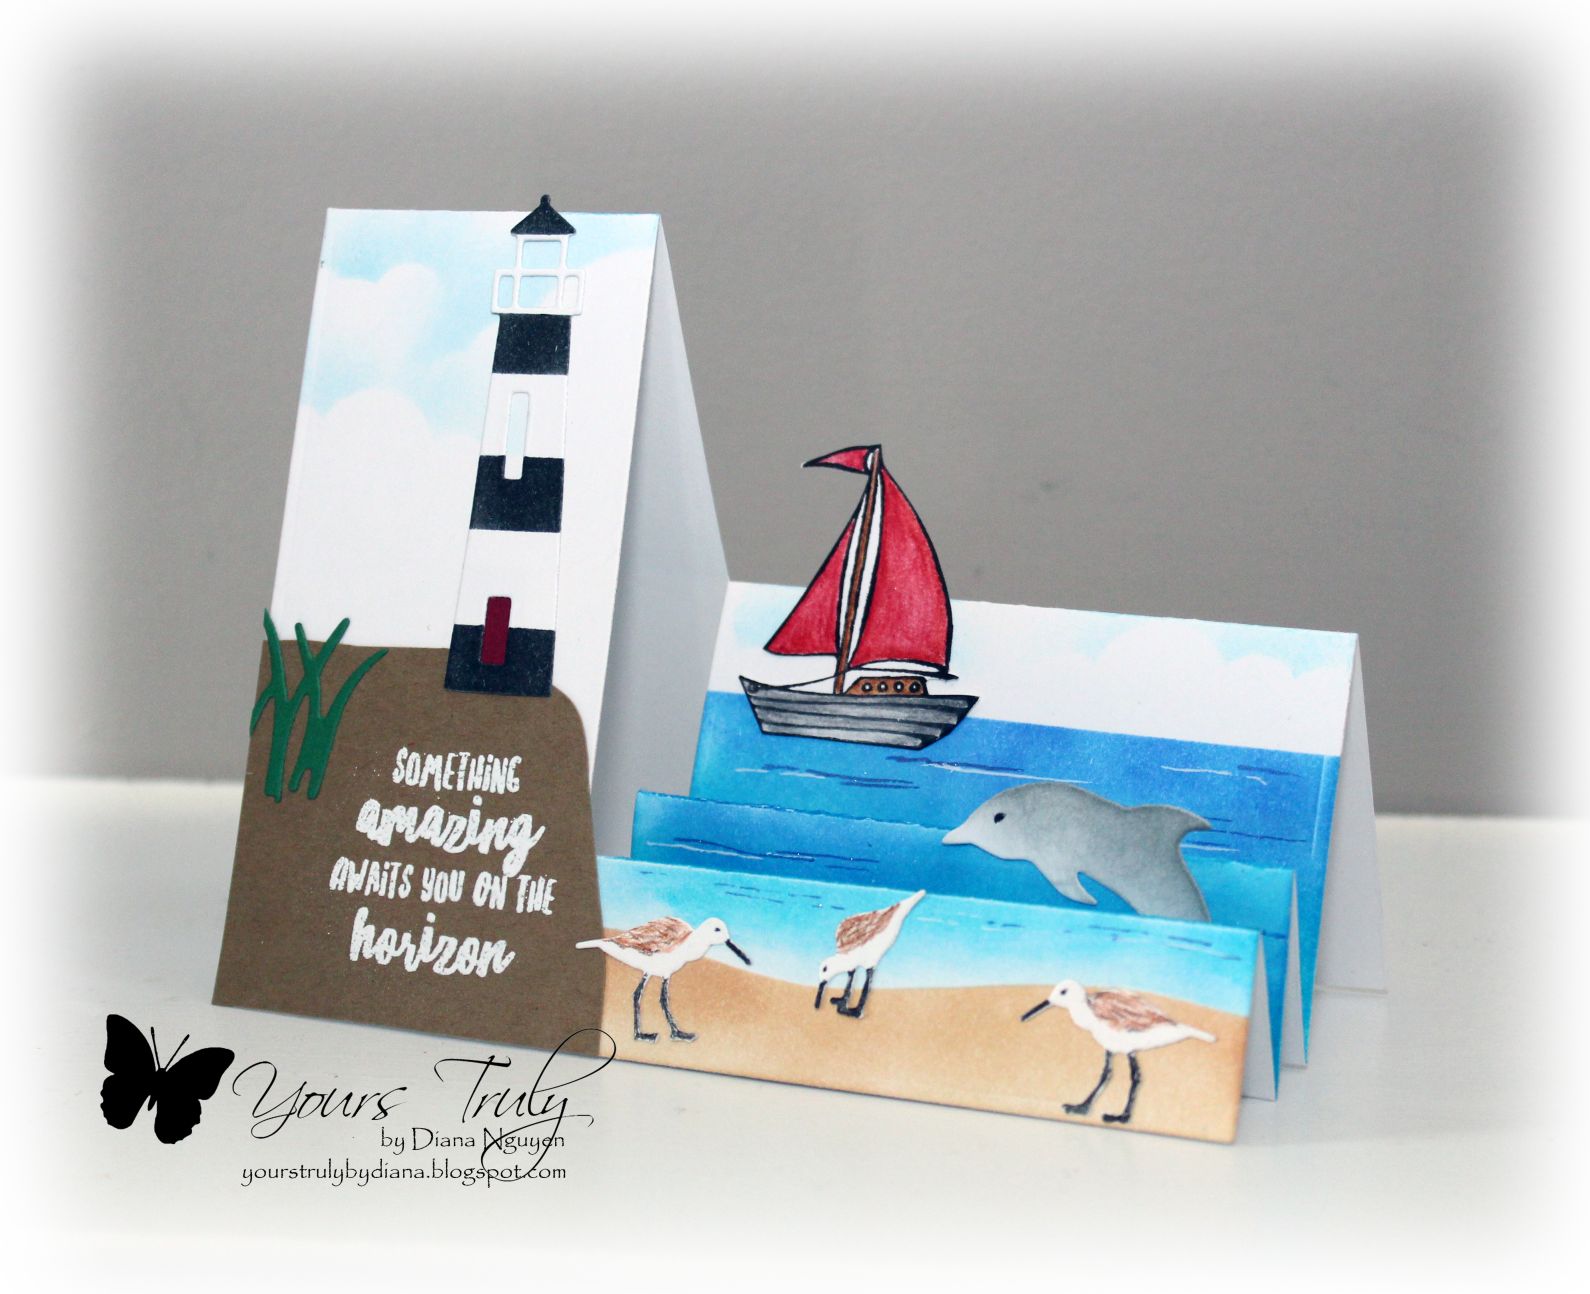
On the Horizon

Here's another card from my crafty play date using some nautical themed dies:  Memory Box Diving Dolphins die, Poppystamps Seaside Lighthouse die, Impression Obsession Shore Birds and grass dies and stamps from Essentials by Ellen Stay Salty.  The side step card die by Our Daily Bread Designs was perfect for making this kind of card with lots of depth.  


The sand, water, and sky were all sponged using distress inks.  The Sakura gelly pens (Stardust and white) are perfect for adding details to the water.  The sentiment was embossed in white.


Creating scenes of dies are really fun - it's even more so with a special card fold like this side step card.


Saturday, August 20, 2016

Brrrrrrr...

 Well, it's only "Brrrrrrr" in my craft room because it's in the basement and therefore the coolest spot in the house... and because I made this very fun shaker card using Poppystamps Sparkling Corner Snowflake with the new Quietfire's Brrrrr metal die.  Maybe it's because I have kids but interactive cards are so fun to make and play with once done.

I first die cut out a white frame using nesting Rectangle dies (Spellbinders Matting Basics A here) and then die-cutting the snowflake corner and Brrrrrrr out of white card stock.  I adhered the snowflake corner to the back of the white frame, trimmed off the excess and then glued all that on a sheet of clear acetate.  I made an ombre blue background so that the delicate snowflakes would show and added sequins in white, silver, light blue, and royal blue for my shaker elements.


When I added the Brrrrrrr, I realized that it kind of disappeared because of the light background so I die-cut it out of the same blue as my card base and gave it a shadow effect by gluing the second Brrrrrrr slightly off.  I then adhered them to the front of the card.


Challenges I am playing in:

Monday, June 6, 2016

Christmas in June

Taking a break from birthday cards and jumping to Christmas for a second!  I had gotten this Poppystamps Village Lamp Post a while back and could not put off playing it with any longer.

Diana Nguyen, poppystamps, christmas, lamp

To make my night snowy scene, I masked off a big circle where the light would be and sponged generously some Distress Inks (Salty Ocean, Seedless Preserves, and Chipped Sapphire.)  I then sponged some yellows and orange in the center of the circle.

Diana Nguyen, poppystamps, christmas, lamp

The Village Lamp Post also comes with the backs of the lights which I die-cut in Scor-tape, adhered to the lamp post that I had added a layer of Ultra Thick Embossing powder, and added glitter for the light.  

I also splattered some water onto my background, added some snow with a white gel pen and a small poinsettia with microbeads stamens.  Hope you like it and thank you for looking!


Ttt_board

Challenges I am playing in:
Poppystamps Challenge Tic-Tac-Toe (Flower, Ribbon, and Sparkle)


Monday, February 15, 2016

CCNS124: Mitten Shaker Card


I was in the mood to make another shaker card.  This time I used Poppystamps Stacked Mittens with some heart shaped glitter for my card.  The frames were made using Spellbinders A2 Matting Basics A, Scor-tape, and clear cardstock.  By nestling the rectangle dies together, you can create a window for your shaker element.  I find this is the easiest way to make a shaker card.  Instead of using foam tape, I used the same set of dies on fun foam to add space between the clear card stock and the blue background paper.  I also used a white gel pen to add stitching details around the frame.
Thank you for looking and hope you get a chance to play in the Stitches, Patterns, and Colors Challenge.


Monday, January 25, 2016

Good friends

So we've gotten about 3 feet of snow here... snowed in with all the kids... no time to play between shoveling and drying out wet coats and gloves.  It's absolutely gorgeous out there though.  The kids are thrilled with no school and my Samoyed is in heaven with all this snow.  

So this card was done back on Friday but I haven't had time to post it! It was a quick card - some blue sponging on the edges and then glued on a couple of cuts from the Poppystamps Sparkling Snowflake Corner. I couldn't figure out a way to put my sentiment so I opted for making my front totally clear with clear card stock and stamped by sentiment Good Friends Are Like Snowflakes by Quietfire Design with Staz-On.  The pretty background became the inside of the card.


Good Friends are Like Snowflakes - Mounted


Happy as can be that there is finally snow!


Challenges I am playing in:


Monday, January 18, 2016

CCNS120: Wherever you go

Diana here with a cute card I made combining dies, stamps, and buttons for this week's challenge at CCNS.  I love making little scenes out of dies.  Today I used Spellbinders A2 Matting Basics AImpression Obsession Evergreen Trees, and Poppystamps Scribble Clouds.  I sponged Broken China for my skies and colored my little critters from Mama Elephant's Up and Away with Copics.  I thought the buttons would make such cute balloons.  After fussy cutting out the monkey and raccoon, I popped them up with small Joy! foam pads to add some extra dimensions.   


There wasn't room on the front so I extended the scene to the inside of the card and found the perfect verse for it from ODBD Scripture Collection 3:

Be strong and courageous.  Do not be terrified, do not be discouraged, for the Lord your God will be with you wherever you go.
Joshua 1:9


Challenges I am playing in:


Monday, January 11, 2016

CCNS119: Feel better soon

What do you do to feel better?  Seems like a cliche but a cup of tea really does make me feel better... especially paired with some chocolate.  A handmade card can also do the trick - so nice to see a written card amongst the pile of bills and ads in the mailbox - especially now that Christmas has passed.

To make my bright background and teacup stack, I sponged a sheet of white card stock die cut with the largest Spellbinders A2 Matting Basics A as well as a scrap sheet (big enough for the teacup stack die.)  I used the colors Evergreen BoughBroken ChinaPicked Raspberry, and Shaded Lilac.  I then placed the gorgeous flourish die from ODBD Vintage Flourish Pattern.  The Poppystamps Teacup Stack was cut once from the sponged scrap paper and then another 4 times on white card stock.  I then stacked all the die cuts using some Art Institute glue.  I love the dimension it gives.  Finally, I added a ribbon and a tag using ODBD Mini Tag Sentiments and Dies.

Diana Nguyen, Our Daily Bread Design, Poppystamps, teacup stack


Thursday, January 7, 2016

Snow and Winterberries

I think one of the pretties winter images is fallen snow - especially  on tree branches.  Even more amazing is how they can clump on the tiniest of things like the little red berries.  I tried to recreate that here with some things from the Classy Cards 'n Such store.  

I wanted my card to be shimmery white and red so I started with a white card base and added the ODBD Vintage Flourish Pattern in Shimmering White.  The Poppystamps Holiday Winterberries was cut out of water color paper twice and colored with the red and green colors from the Twinkling H2O's Thankful set. After I adhered the two branches of the winterberries using Art Institute glue to a popped up frame, I added "snow" with the ice white Viva Decor Pearl Pen and some sparkling Stickles.  The verse from ODBD Faith is stamped in black and then clear embossed.
Diana Nguyen, Our Daily Bread Designs, Faith, Poppystamps, Holiday Winterberries, Vintage Flourish Pattern

Thank you so much for looking!

Challenges I am playing in:

Monday, January 4, 2016

CCNS118 Winter Fairies

Hello, Diana here with a winter inspired card.  And I am more inspired by this week's inspiration photo at CCNS than I am the weather outside.  It has been so mild and even hot on some days.  It's made me wish for snow more than usual... and I'm not even a big fan of winter!

To create my wintry blue card, I started with a sheet of watercolor paper that I sprayed with water and some Ultramarine Blue color bursts.  Once that dried, I trimmed it down with the largest die from Spellbinders A2 Matting Basics A.  I also cut from the same sheet the Impression Obsession Small Snowflake Set.  For my top layer, I once again started with the largest die from Spellbinders A2 Matting Basics A but with white card stock.  I then used  Poppystamps Distressed Benson corner die cut - it gives a beautiful negative die cut with just the right amount of swirls. 

Diana Nguyen,Quietfire Design, winter, distressed Benson corner, poppystamps

I then stamped this quote from Quietfire Design's Deep Within the Winter Forest with Memento Luxe Nautical blue pigment die and added clear embossing powder over it.  Once I heat set that dry, I added the snowflakes using Art Institute glue to finish my card.

Diana Nguyen,Quietfire Design, winter, distressed Benson corner, poppystamps

Thank you so much for looking!


Thursday, December 31, 2015

Thanks a latte

Hello!  Have you gotten those thank you cards written for all your Christmas presents?  I've got an easy design for you in case you're in need of some.  You want to first sponge some white card stock with your favorite colors of distress inks or sprays.  Here I used Squeezed LemonadePeacock Feathers, and Broken China.  I then die cut this darling Poppystamps Teapot Stack out of the sponged card stock.  My top layer was cut to size with Spellbinders A2 Matting Basics A and Impression Obsession Fancy Border Cutout.  I  glued my teacup stack die cut on there and stamped a thank you note (this one is from Verve's Better with You) and embossed with black detail embossing powder.   I then popped up this layer on top of the sponged colors so that the colors could peek through.  

.

Diana Nguyen, teacup stack, Impression Obsession, Poppystamps, Verve


Thursday, December 24, 2015

Winterberry Tag

Hello!  I hope you have all your gifts wrapped and ready, that you arrive at your destination safely, or if you're hosting - you're done cleaning and prepping so that you can enjoy Christmas with family and friends.  One last tag to share with you today - it would work well as a Christmas tag (if you're in need of one in these last moments) or you can stick in on a card and send it anytime during the winter.

Supplies:
MFT cross-stitch Rectangle dies
Broken China distress ink


Diana Nguyen, Poppystamps, Winterberry, tag


1.  Create tag by die cutting a rectangle and circle with MFT dies.
2.  Sponge around edges with Broken China distress ink.
3.  Stencil tiny snowflakes on tag.  Set aside to dry.
4.  Die cut winterberries die out of watercolor paper and color.
5.  Adhere to tag and add ribbons.

Merry Christmas!


Challenges I am playing in:

Thursday, December 10, 2015

Sending warm hugs

Hello!  Diana here and I am just loving this cute little Poppystamps Stacked Mittens die.  I wanted a soft card so I went for some light sponging with Peacock FeathersSqueezed Lemonade, and Picked Raspberry along one side of a stitched rectangle made with MFT Blueprints 13.  I then glued several layers of the Stacked Mittens  and added a couple of fish tail banners with a sentiment from Sweet 'n Sassy stamps For the birds done with silver detail embossing powder.  For a final touch, I added a bit of bling using sequins.  Hope you like it!

Diana Nguyen, poppystamps, Sweet 'n Sassy Stamps, winter


Monday, December 7, 2015

CCNS114: O Holy Night

Hello!  Today I am sharing a card I made with you for this week's Angel challenge at CCNS.  I went with the soft and neutral colors in the inspiration photo.

Supplies:
Cuttlebug Musical Flourish embossing folder


Diana Nguyen, Our Daily Bread Designs, christmas, angel, card

1.  To make the angel, I cut out of silver card stock a triangle and punches a circle.  
2.  The wings are vellum die cuts using the PoppyStamps Cheviot Butterfly
3.  Add stickles and dots pearls using the white Viva Decor Pearl Pen.  The stickles will curl up the wings naturally when drying.


Diana Nguyen, Our Daily Bread Designs, christmas, angel, card

Thanks for looking!